Working with Visual Planes
You can add up to three visual planes to a 3D view to clip datasets, regions of interest, multi-ROIs, and meshes along an arbitrary plane or planes. In addition to letting you interactively clip image data, regions of interest, multi-ROIs, and meshes, additional visual effects can also be applied to the clipped region of selected objects, such as look-up table functions, edge contrast, and window leveling.
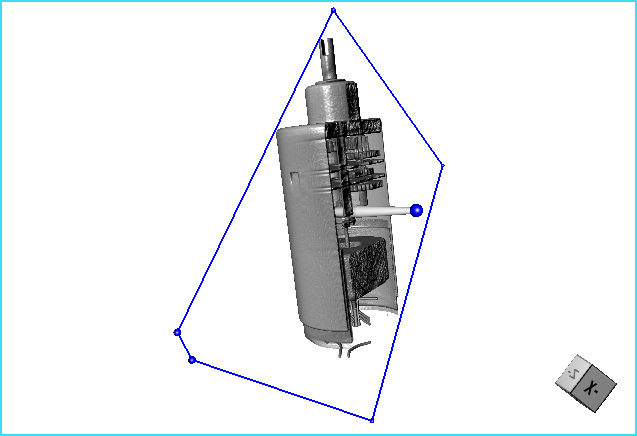
Visual plane in 3D view
Options for creating and modifying visual planes are available in the Visual Plane panel, shown below. Visual effects for clipped regions are available on the Data Properties and Settings panel (see Shape Properties and Settings).
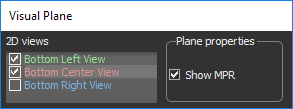
Visual Plane panel
|
|
|
|---|---|
|
2D views |
Determines the origin of the visual plane(s). Each available visual plane is linked to a 2D view and the controls available in the 2D view, such as the 3D Cursor, can be used to manipulate the visual plane. NOTE The availability of visual planes is dependent on the number of MPR views in the current scene (see Scene Layouts and Views for information about selecting a scene view that includes 2D views). |
|
Show MPR |
If selected, data from the corresponding 2D view will be shown on the plane in the 3D view.
|

- Make sure that the scene in which you are working includes at least one 2D view in addition to the 3D view.
You should note that working in a scene with all three MPR views visible lets you to add up to three visual planes.
- Select the visual plane(s) you want to add to the 3D view in the Visual Plane panel.
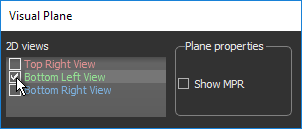
- Choose the Plane property Show MPR for each selected plane, optional.
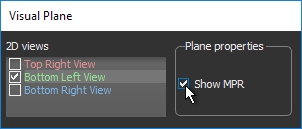
If selected, data from the corresponding 2D view will be shown on the plane in the 3D view.
- Select the visual plane in the Data Properties and Settings panel and changes its visibility in 3D, if required.
The visual plane and its control handle appear in the 3D view.
- Adjust the visual plane(s) as required.
- Drag either end of the visual plane handle to adjust its angle.
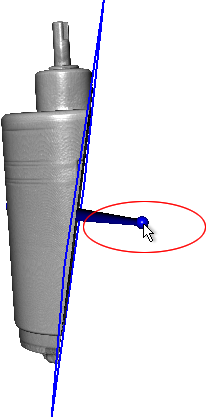
NOTE The object in the illustration above was clipped for clarity. Clipped must be selected as a visual effect to be applied.
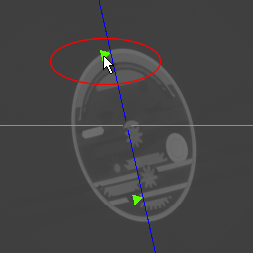
You can also adjust the plane angle by dragging the Angle marker on the 3D cursor in the MPR views of the dataset. See Using the 3D Cursor for more information about the 3D cursor controls.
- Drag the handle to translate the plane along the selected angle.
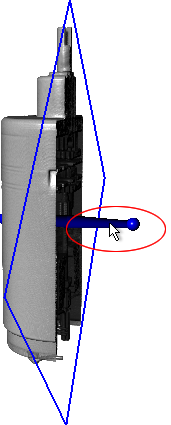
You can also translate planes by scrolling the associated 2D view or by dragging the 3D cursor in the MPR views of the dataset (see Using the 3D Cursor).
- Drag either end of the visual plane handle to adjust its angle.
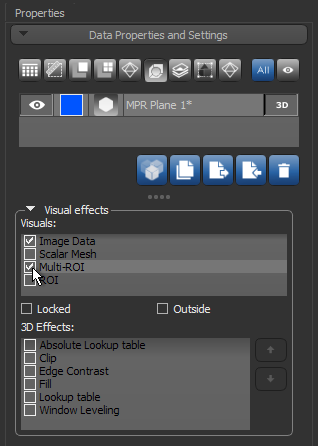
- Select the visuals to which you want to apply the plane effects to.
To apply the Visual Plane effects, check the required object(s) in the Visuals list on the Data Properties and Settings panel.
- Lock the plane in the 3D view by checking the Locked option, recommended.
- Select the required effect(s) and adjust their associated properties, as required (see Visual Effects and Properties).
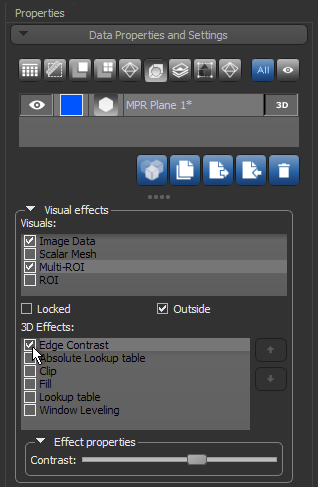
NOTE You can apply the selected effects to the outside or inside of the visual plane by checking the or unchecking the Outside option.